


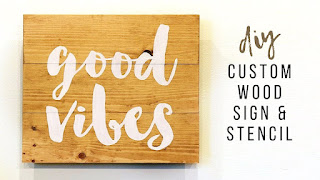
Crafting a Bespoke Wooden Wall Sign: A Comprehensive Guide to Stenciling and Painting
This detailed guide provides a comprehensive walkthrough for creating a personalized wooden wall sign using stencils and paint. The process, while seemingly straightforward, demands precision and attention to detail for optimal results. From material selection to final finishing touches, each step is meticulously outlined to ensure a professional-quality, handcrafted piece that reflects both artistry and personal expression.

Phase 1: Project Planning and Material Acquisition
Before embarking on the creative process, meticulous planning is crucial. This phase involves defining the project's scope, selecting appropriate materials, and ensuring the necessary tools are readily available. Careful consideration at this stage will significantly enhance the efficiency and overall quality of the finished product.
1.1 Defining the Scope of the Project
The initial step involves conceptualizing the desired design and dimensions of the wooden wall sign. Consider the following aspects:
- Intended Message or Design: Determine the text or image to be displayed. Simplicity often yields elegance. Overly complex designs can be challenging for beginners.
- Dimensions of the Sign: Measure the available wall space and select appropriate dimensions for the sign. Consider the scale of the surrounding décor.
- Font Selection (If Applicable): If text is involved, choose a font that is legible and aesthetically pleasing. Avoid overly ornate fonts which can be difficult to stencil.
- Color Palette: Select a color scheme that complements the existing décor and reflects your personal style. Consider the contrast between the text/design and the background.
1.2 Material Selection
Choosing the right materials is paramount for achieving a durable and visually appealing sign. The following materials are recommended:
- Wood Type: Opt for a wood type that is readily available, relatively inexpensive, and easy to work with. Pine, plywood, or MDF (medium-density fiberboard) are suitable choices for beginners. Consider the thickness; thicker wood provides greater stability.
- Paint Type: Acrylic paints are widely recommended for their versatility, ease of use, and durability. Choose high-quality paints for optimal coverage and longevity.
- Stencil Material: Several materials can be used for stencils, including acetate sheets, reusable plastic stencils, or even contact paper. Choose a material that is durable and allows for clean, crisp lines.
- Sealer (Optional): A clear sealant will protect the finished sign from moisture and enhance its longevity. Consider a water-based sealant for ease of application and minimal odor.
1.3 Tool Acquisition
Gathering the necessary tools before commencing the project will streamline the process and prevent interruptions. Essential tools include:
- Measuring Tape and Pencil: Precise measurements are critical for accurate stencil placement and overall sign dimensions.
- Jigsaw or Hand Saw (if creating the sign from scratch): Used to cut the wood to the desired dimensions.
- Sandpaper: Essential for smoothing the wood surface before painting, ensuring a clean and professional finish.
- Paintbrushes: Choose brushes appropriate for the size and detail of the design. High-quality brushes will ensure even paint application.
- Painter's Tape (Optional): For masking off areas to prevent accidental paint spillage.
- Stencil Cutter (if creating custom stencils): Used for precise stencil cutting from acetate sheets.
- Sponge Roller (Optional): For larger areas of paint application, providing a smoother finish.
Phase 2: Sign Construction and Stencil Preparation
This phase encompasses the construction of the wooden base (if necessary) and the preparation of the stencil for accurate and efficient application.
2.1 Wood Preparation (if applicable)
If you are creating the wooden base from scratch, carefully measure and cut the wood to the desired dimensions using a jigsaw or handsaw. Sand the edges and surface of the wood to remove any splinters or roughness. Ensure the surface is smooth and even for optimal paint adhesion.
2.2 Stencil Creation or Selection
If using a pre-made stencil, ensure it is clean and undamaged. For custom stencils, carefully transfer your design onto the chosen stencil material (acetate, contact paper, etc.). Use a sharp craft knife or stencil cutter for precise cuts. Remember that sharp, clean cuts are essential for clean stencil application.
2.3 Stencil Placement and Securing
Once the stencil is prepared, carefully position it on the wooden surface. Use painter's tape to secure the stencil firmly, ensuring no gaps or movement during the painting process. Precise placement is crucial to avoid smudging and ensure a professional outcome.
Phase 3: Painting and Finishing
This phase focuses on the meticulous application of paint to the stencil and the final sealing of the finished product.
3.1 Paint Application
Apply the paint using gentle, dabbing motions to avoid paint bleeding under the stencil. Multiple thin coats are preferable to one thick coat to avoid paint buildup and ensure even coverage. Allow each coat to dry completely before applying the next.
3.2 Stencil Removal
Once the paint is fully dry, carefully peel back the stencil. If any paint bleeds occurred, use a fine-tipped brush or toothpick to clean up any stray marks. Take your time; patience ensures a clean finish.
3.3 Finishing Touches and Sealing
After the paint is completely dry, inspect the sign for any imperfections. Lightly sand any raised areas of paint. Apply a clear sealant to protect the paint and the wood, extending the life of your handcrafted sign. Allow the sealant to dry completely before hanging your sign.
Phase 4: Hanging and Display
The final phase involves the careful hanging and display of your meticulously crafted wooden wall sign. Consider the location, lighting, and surrounding décor to ensure optimal visual impact.
4.1 Choosing a Location
Select a location that complements the sign's design and message. Consider the lighting in the area; proper lighting can enhance the visual appeal of your creation. Ensure the chosen location allows the sign to be prominently displayed and appreciated.
4.2 Secure Hanging
Use appropriate hanging hardware, such as picture hooks or screws, to securely mount the sign to the wall. Ensure the hardware is suitable for the weight of the sign and the wall material. Proper hanging ensures the longevity and safety of your project.
By following these detailed steps, you can successfully create a personalized wooden wall sign that reflects your individual style and adds a unique touch to your home décor. Remember that patience and precision are key to achieving a professional-quality result. Enjoy the creative process and the satisfaction of crafting a beautiful and lasting piece of art.


Tidak ada komentar:
Posting Komentar